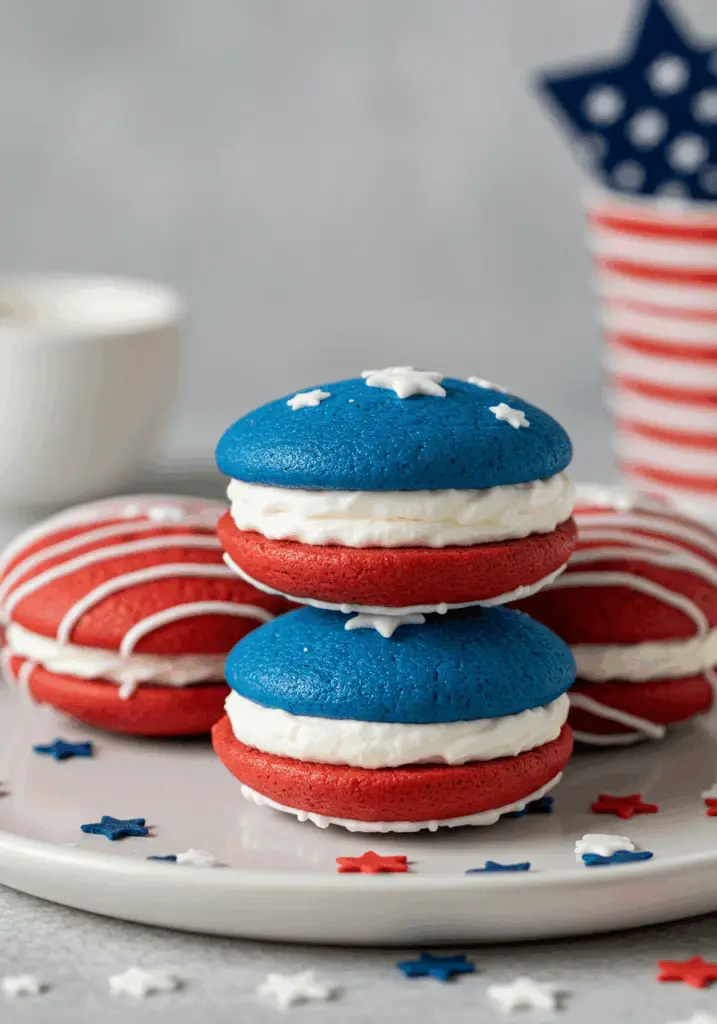
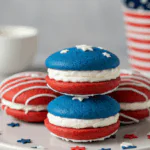
Celebrate Independence Day with these fun and festive 4th of July Whoopie Pies! These patriotic treats feature soft, cake-like cookies in red, white, and blue hues, sandwiched around a fluffy vanilla cream filling. They’re sweet, colorful, and perfect for holiday parties, picnics, or any summer gathering where you want to add a little star-spangled joy to the dessert table.
Want recipes like this delivered straight to your inbox? Subscribe now to get the latest culinary creations you’ll love.
Why You’ll Love This Recipe
Patriotic Perfection – Red, white, and blue never looked so sweet.
Soft & Fluffy – Like mini cakes with creamy centers.
Make-Ahead Friendly – Easy to store and even better the next day.
Fun for All Ages – Kids and adults alike love these colorful sandwich treats.
Great for Parties – Easy to transport and share.
Ingredients You’ll Need
For the Cakes:
- 2 cups all-purpose flour
- ½ cup unsweetened cocoa powder (for red & blue versions)
- 1½ tsp baking soda
- ½ tsp salt
- 1 cup granulated sugar
- ½ cup unsalted butter, softened
- 1 large egg
- 1 tsp vanilla extract
- 1 cup buttermilk
- Red and blue gel food coloring
For the Filling:
- ½ cup unsalted butter, softened
- 1½ cups powdered sugar
- 1 jar (7 oz) marshmallow creme
- 1 tsp vanilla extract
- Pinch of salt
Tools You’ll Need
- Mixing bowls
- Hand or stand mixer
- Measuring cups and spoons
- Cookie scoop or tablespoon
- Baking sheets
- Parchment paper
Step-by-Step Instructions
Step 1: Make the Whoopie Pie Batter
- Preheat oven to 350°F (175°C) and line baking sheets with parchment paper.
- In a medium bowl, whisk together flour, cocoa powder (if using), baking soda, and salt.
- In a large bowl, cream together butter and sugar until light and fluffy.
- Beat in egg and vanilla extract.
- Alternate adding the dry ingredients and buttermilk, beginning and ending with the dry mixture. Mix just until combined.
- Divide batter into three bowls. Leave one white, tint one red, and tint the other blue using gel food coloring.
Step 2: Bake the Cakes
7. Using a cookie scoop, drop rounded tablespoons of batter onto prepared baking sheets, spaced about 2 inches apart.
8. Bake for 9-11 minutes or until tops are set and spring back when touched.
9. Let cool on baking sheets for 5 minutes, then transfer to wire racks to cool completely.
Step 3: Make the Cream Filling
10. In a bowl, beat butter until creamy.
11. Add powdered sugar and beat until fluffy.
12. Beat in marshmallow creme, vanilla extract, and salt until smooth.
Step 4: Assemble the Whoopie Pies
13. Match cookies in pairs by size and shape.
14. Spread or pipe filling onto the flat side of one cookie.
15. Top with a second cookie, pressing gently to spread the filling to the edges.
16. Roll edges in patriotic sprinkles for extra flair if desired.
Tips for Perfect Whoopie Pies
Use Gel Food Coloring – For vibrant red and blue colors without thinning the batter.
Don’t Overmix – This keeps the cakes tender and fluffy.
Cool Completely – Before adding filling to prevent it from melting.
Make Uniform Sizes – Use a cookie scoop for even baking and neat sandwiches.
Chill Before Serving – Firm filling and melded flavors taste even better.
Serving Suggestions
Patriotic Dessert Table – Pair with flag-themed cupcakes and sugar cookies.
Picnic Favorite – Easy to pack and serve without utensils.
Party Favor Bags – Wrap individually in clear bags tied with red and blue ribbon.
With Cold Milk or Lemonade – Classic drinks for a summery vibe.
How to Store
Storing:
Room Temperature: Store in an airtight container for up to 2 days.
Refrigerate: Keeps fresh longer—up to 5 days. Bring to room temp before serving.
Freezing:
Wrap each whoopie pie individually and freeze for up to 1 month. Thaw in the fridge overnight.
Frequently Asked Questions
- Can I skip the cocoa for non-chocolate versions?
Yes! Just increase flour by ¼ cup to compensate. - Can I make these gluten-free?
Use a 1:1 gluten-free baking flour blend for best results. - What if I don’t have marshmallow creme?
Use whipped cream cheese frosting or vanilla buttercream as a substitute. - How do I keep the filling from squishing out?
Chill the filled whoopie pies for 20 minutes to help set the filling.
Final Thoughts
These 4th of July Whoopie Pies are a festive, fun, and flavorful way to add a pop of color and sweetness to your celebration. With their soft cake-like texture and creamy center, they’re sure to be a hit with kids and adults alike.
Give them a try for your next patriotic party and watch them disappear fast! Don’t forget to share your creations—I’d love to see your star-spangled treats.
Preparation Time: 20 minutes
Cooking Time: 10 minutes
Assembly Time: 15 minutes
Cuisine: American
Nutritional Information (Per Pie):
Calories: 270 | Protein: 3g | Carbohydrates: 36g | Fat: 12g | Fiber: 1g | Sodium: 180mg
4th of July Whoopie Pies
- Total Time: 30 minutes
Description
Celebrate Independence Day with these fun and festive 4th of July Whoopie Pies! These patriotic treats feature soft, cake-like cookies in red, white, and blue hues, sandwiched around a fluffy vanilla cream filling. They’re sweet, colorful, and perfect for holiday parties, picnics, or any summer gathering where you want to add a little star-spangled joy to the dessert table.
Want recipes like this delivered straight to your inbox? Subscribe now to get the latest culinary creations you’ll love.
Ingredients
For the Cakes:
-
2 cups all-purpose flour
-
½ cup unsweetened cocoa powder (for red & blue versions)
-
1½ tsp baking soda
-
½ tsp salt
-
1 cup granulated sugar
-
½ cup unsalted butter, softened
-
1 large egg
-
1 tsp vanilla extract
-
1 cup buttermilk
-
Red and blue gel food coloring
For the Filling:
-
½ cup unsalted butter, softened
-
1½ cups powdered sugar
-
1 jar (7 oz) marshmallow creme
-
1 tsp vanilla extract
-
Pinch of salt
Instructions
Step 1: Make the Whoopie Pie Batter
-
Preheat oven to 350°F (175°C) and line baking sheets with parchment paper.
-
In a medium bowl, whisk together flour, cocoa powder (if using), baking soda, and salt.
-
In a large bowl, cream together butter and sugar until light and fluffy.
-
Beat in egg and vanilla extract.
-
Alternate adding the dry ingredients and buttermilk, beginning and ending with the dry mixture. Mix just until combined.
-
Divide batter into three bowls. Leave one white, tint one red, and tint the other blue using gel food coloring.
Step 2: Bake the Cakes
7. Using a cookie scoop, drop rounded tablespoons of batter onto prepared baking sheets, spaced about 2 inches apart.
8. Bake for 9-11 minutes or until tops are set and spring back when touched.
9. Let cool on baking sheets for 5 minutes, then transfer to wire racks to cool completely.
Step 3: Make the Cream Filling
10. In a bowl, beat butter until creamy.
11. Add powdered sugar and beat until fluffy.
12. Beat in marshmallow creme, vanilla extract, and salt until smooth.
Step 4: Assemble the Whoopie Pies
13. Match cookies in pairs by size and shape.
14. Spread or pipe filling onto the flat side of one cookie.
15. Top with a second cookie, pressing gently to spread the filling to the edges.
16. Roll edges in patriotic sprinkles for extra flair if desired.
Notes
Use Gel Food Coloring – For vibrant red and blue colors without thinning the batter.
Don’t Overmix – This keeps the cakes tender and fluffy.
Cool Completely – Before adding filling to prevent it from melting.
Make Uniform Sizes – Use a cookie scoop for even baking and neat sandwiches.
Chill Before Serving – Firm filling and melded flavors taste even better.
- Prep Time: 20 minutes
- Cook Time: 10 minutes
- Cuisine: American