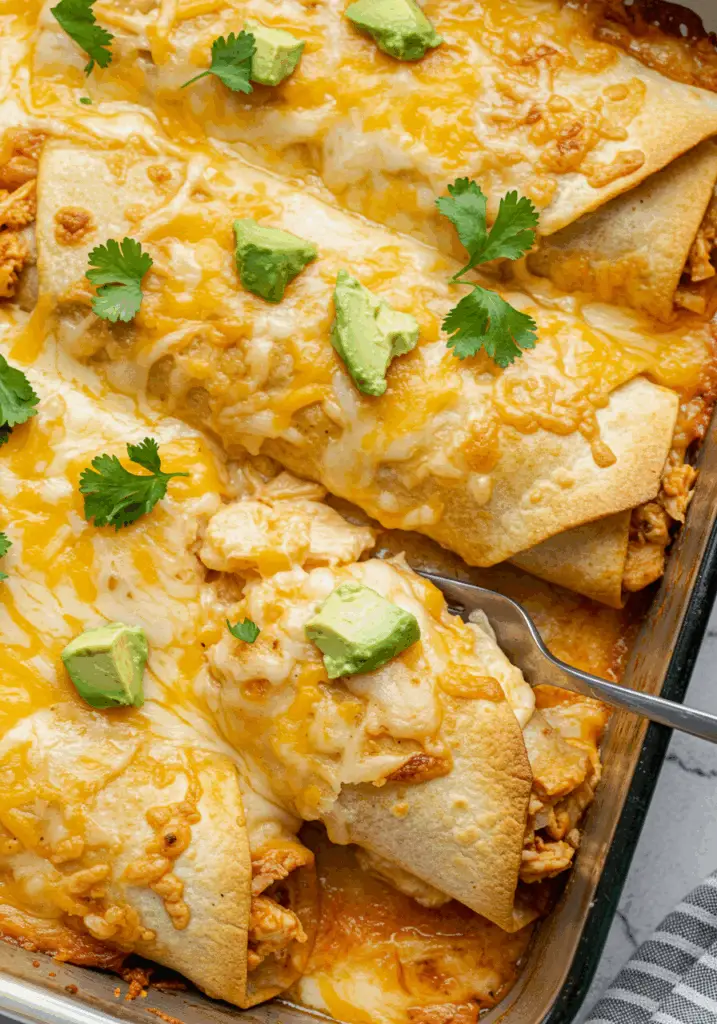
Craving the crispy, golden flavor of a fried chimichanga without all the grease? These Baked Chicken Chimichangas are the perfect solution. Filled with juicy, seasoned chicken, creamy cheese, and hearty beans, then baked until crisp, they deliver everything you love about Tex-Mex chimichangas—just a little lighter and oven-friendly!
Want recipes like this delivered straight to your inbox? Subscribe now to get the latest culinary creations you’ll love.
Why You’ll Love This Recipe
Crispy Without the Frying – All the crunch, none of the mess.
Hearty & Flavorful – Packed with shredded chicken, beans, cheese, and spices.
Family-Friendly – Mild spice and customizable fillings make it a hit with everyone.
Make-Ahead Friendly – Assemble and refrigerate or freeze for busy nights.
Better-for-You Comfort Food – Lighter than traditional fried versions.
Ingredients You’ll Need
For the Chicken Filling:
- 2 cups cooked, shredded chicken breast or thigh
- ½ cup refried beans (or black beans, mashed slightly)
- 1 cup shredded cheddar or Monterey Jack cheese
- ½ cup sour cream or Greek yogurt
- 1 can (4 oz) diced green chilies, drained
- 1 tsp ground cumin
- 1 tsp chili powder
- ½ tsp garlic powder
- ½ tsp onion powder
- ¼ tsp salt
- ¼ tsp black pepper
- 2 tbsp chopped fresh cilantro (optional)
For Assembly:
- 6 large flour tortillas (burrito-size)
- 2 tbsp olive oil or melted butter (for brushing)
Optional Toppings:
- Salsa or pico de gallo
- Guacamole or avocado slices
- Sour cream or crema
- Shredded lettuce
- Chopped tomatoes
- Jalapeño slices
Tools You’ll Need
- Baking sheet
- Mixing bowl
- Pastry brush
- Aluminum foil or parchment paper
Step-by-Step Instructions
Step 1: Preheat & Prep
- Preheat oven to 400°F (200°C).
- Line a baking sheet with foil or parchment for easy cleanup.
Step 2: Make the Filling
3. In a large mixing bowl, combine shredded chicken, refried beans, cheese, sour cream, green chilies, and all seasonings.
4. Mix until well blended. Add cilantro if using.
Step 3: Assemble the Chimichangas
5. Warm tortillas slightly in the microwave to make them more pliable (10–15 seconds).
6. Spoon about ½ cup of the filling into the center of each tortilla.
7. Fold the sides in, then roll up tightly like a burrito.
8. Place seam-side down on the baking sheet.
Step 4: Brush & Bake
9. Lightly brush the tops of each chimichanga with olive oil or melted butter.
10. Bake for 20–25 minutes, flipping once halfway through, until golden and crispy on all sides.
Step 5: Serve Hot
11. Serve immediately with your favorite toppings like salsa, guacamole, or sour cream.
Tips for the Best Baked Chimichangas
Use Fresh Tortillas – They roll easier and bake up crispier.
Flip Halfway – Ensures even crisping on both sides.
Don’t Overfill – Keeps them from bursting open in the oven.
Customize – Add sautéed onions, bell peppers, or corn to the filling.
Freeze for Later – Assemble, wrap in foil, and freeze before baking. Bake from frozen, adding 10–15 minutes to cooking time.
Serving Suggestions
Mexican Rice or Cilantro Lime Rice – A flavorful, filling side.
Refried Beans or Black Beans – Double the bean goodness.
Fresh Salad – A crisp, refreshing contrast to the warm chimis.
Chips & Salsa – Perfect for a Tex-Mex spread.
Iced Lime Water or Agua Fresca – A cool drink to round it out.
How to Store & Reheat
Storing:
- Refrigerate: Store in an airtight container for up to 4 days.
- Freeze: Wrap cooled chimichangas in foil, then store in freezer bags for up to 3 months.
Reheating:
- Oven: Bake at 350°F for 10–15 minutes until heated through.
- Air Fryer: 375°F for 5–7 minutes until crisp.
- Microwave: 1–2 minutes, though it won’t stay as crispy.
Frequently Asked Questions
- Can I make this with rotisserie chicken?
Absolutely! It’s a quick and flavorful shortcut. - What’s the best cheese to use?
Cheddar, Monterey Jack, or a Mexican blend work perfectly. - Are these spicy?
Mildly spiced—add jalapeños or hot sauce for more heat. - Can I make them vegetarian?
Yes! Swap the chicken for more beans, veggies, or tofu. - Do I have to use flour tortillas?
Flour tortillas are best for structure and crispiness. Corn tortillas will not roll or hold up the same way.
Final Thoughts
Baked Chicken Chimichangas are everything you love about a classic chimichanga—warm, crispy, cheesy, and satisfying—just a little lighter and easier. Whether you’re feeding a hungry family or prepping meals for the week, this oven-baked version is a foolproof favorite that delivers Tex-Mex comfort with every bite.
Try it out and let me know what you think! Don’t forget to leave a review below and share your photos on Pinterest! I can’t wait to see how your chimichangas turn out.
Preparation Time: 15 minutes
Cooking Time: 25 minutes
Cuisine: Tex-Mex
Nutritional Information (Per Chimichanga):
Calories: 420 | Protein: 28g | Carbohydrates: 30g | Fat: 22g | Fiber: 3g | Sodium: 690mg

Baked Chicken Chimichangas
Description
Craving the crispy, golden flavor of a fried chimichanga without all the grease? These Baked Chicken Chimichangas are the perfect solution. Filled with juicy, seasoned chicken, creamy cheese, and hearty beans, then baked until crisp, they deliver everything you love about Tex-Mex chimichangas—just a little lighter and oven-friendly!
Want recipes like this delivered straight to your inbox? Subscribe now to get the latest culinary creations you’ll love.
Ingredients
Step 1: Preheat & Prep
-
Preheat oven to 400°F (200°C).
-
Line a baking sheet with foil or parchment for easy cleanup.
Step 2: Make the Filling
3. In a large mixing bowl, combine shredded chicken, refried beans, cheese, sour cream, green chilies, and all seasonings.
4. Mix until well blended. Add cilantro if using.
Step 3: Assemble the Chimichangas
5. Warm tortillas slightly in the microwave to make them more pliable (10–15 seconds).
6. Spoon about ½ cup of the filling into the center of each tortilla.
7. Fold the sides in, then roll up tightly like a burrito.
8. Place seam-side down on the baking sheet.
Step 4: Brush & Bake
9. Lightly brush the tops of each chimichanga with olive oil or melted butter.
10. Bake for 20–25 minutes, flipping once halfway through, until golden and crispy on all sides.
Step 5: Serve Hot
11. Serve immediately with your favorite toppings like salsa, guacamole, or sour cream.
Instructions
-
Baking sheet
-
Mixing bowl
-
Pastry brush
-
Aluminum foil or parchment paper
Notes
Use Fresh Tortillas – They roll easier and bake up crispier.
Flip Halfway – Ensures even crisping on both sides.
Don’t Overfill – Keeps them from bursting open in the oven.
Customize – Add sautéed onions, bell peppers, or corn to the filling.
Freeze for Later – Assemble, wrap in foil, and freeze before baking. Bake from frozen, adding 10–15 minutes to cooking time.