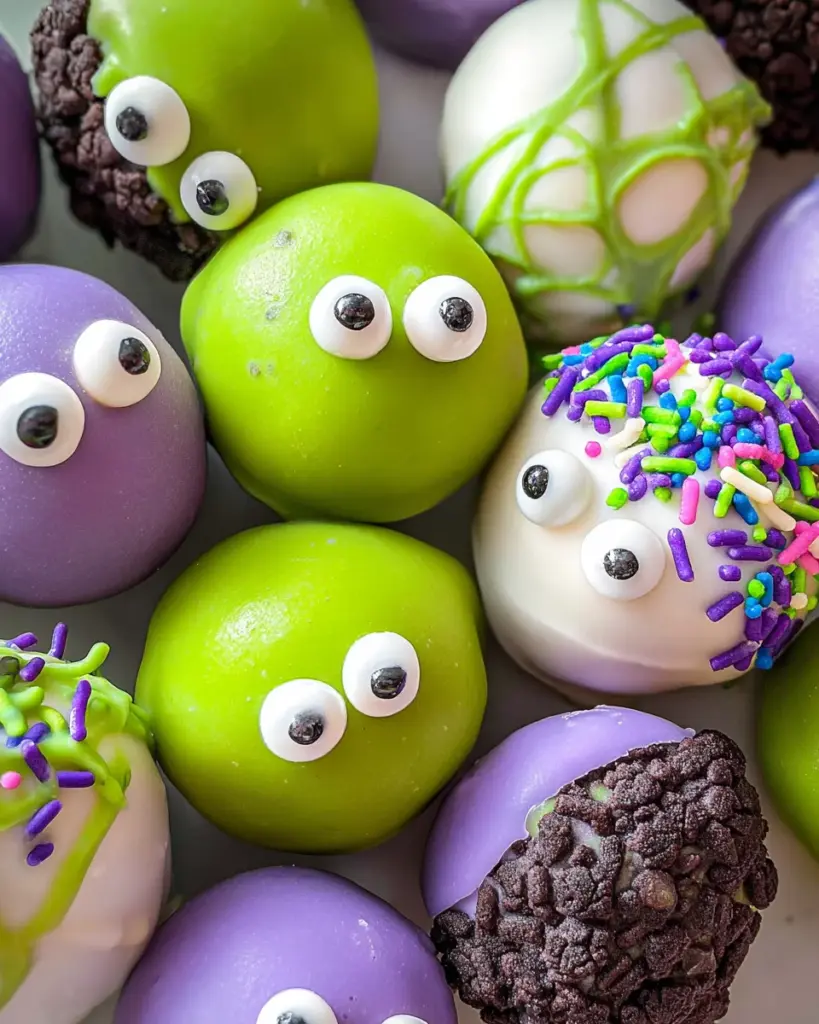
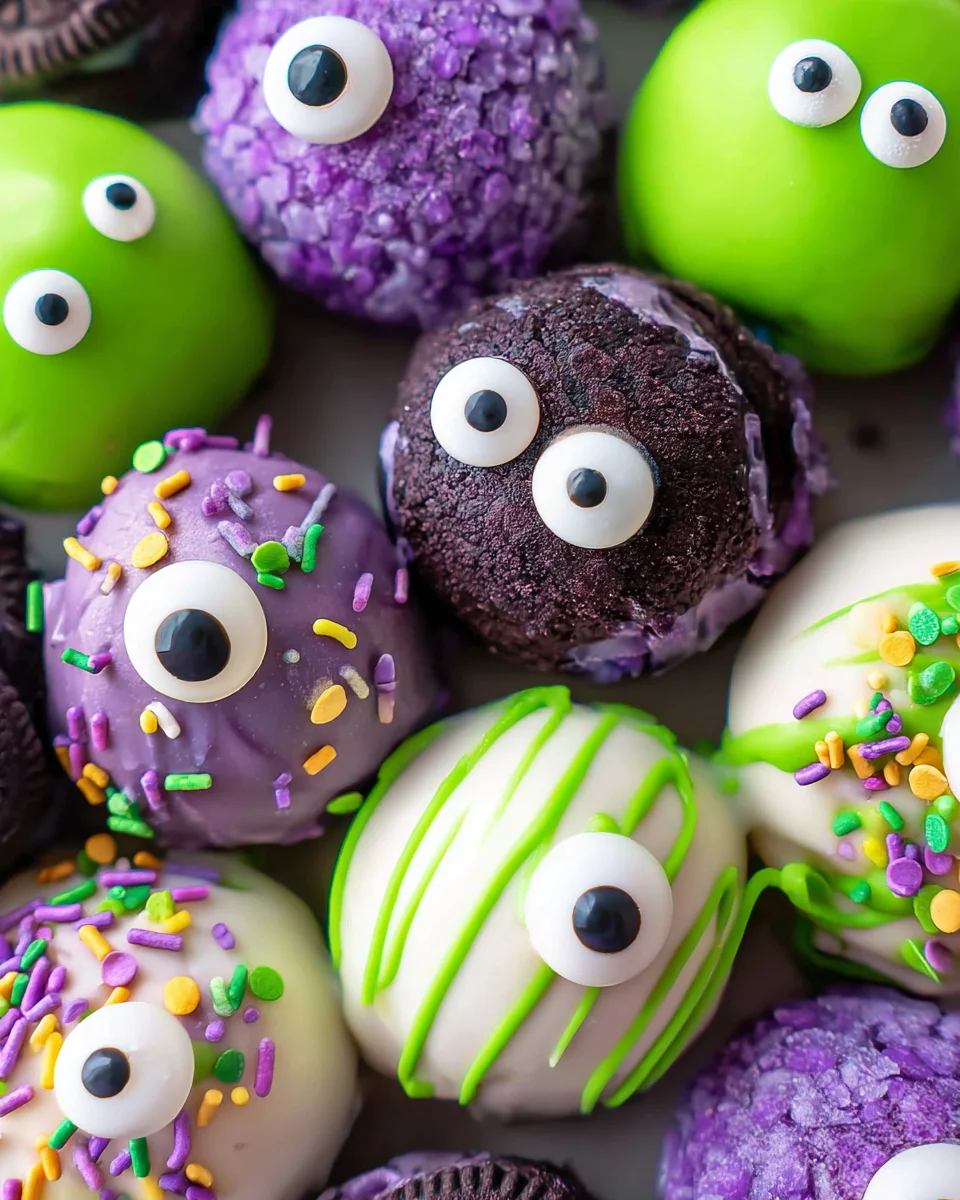
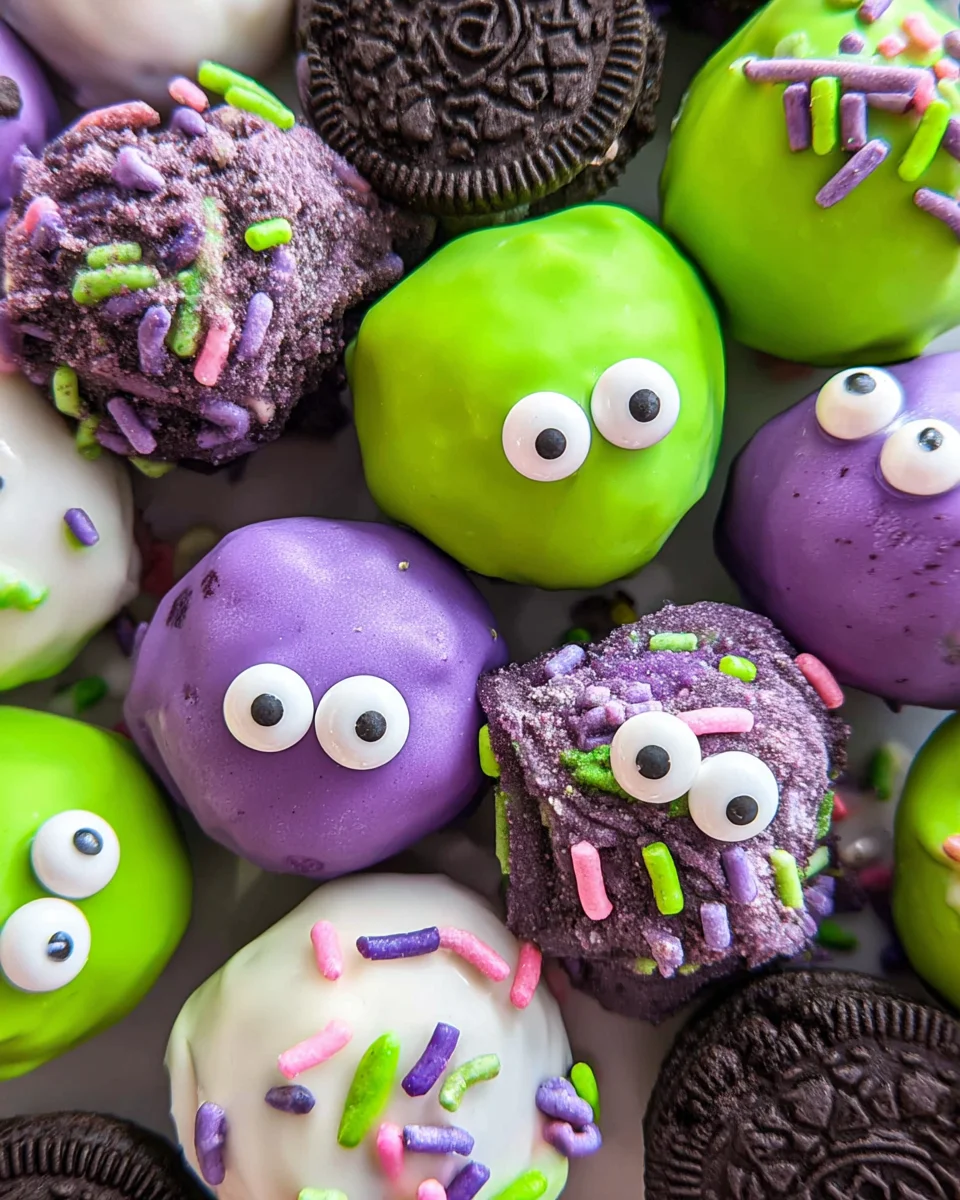
Monster Oreo Balls are a delightful treat perfect for Halloween festivities. These charming little critters are not only easy to make but also offer a fun and interactive experience for family and friends. With their vibrant colors and playful designs, Monster Oreo Balls are sure to be a hit at parties, school events, or simply as a spooky snack at home. Their creamy filling and sweet coating create an irresistible flavor that will leave everyone wanting more.
Why You’ll Love This Recipe
- Easy to Make: This no-bake recipe requires minimal effort and is perfect for bakers of all skill levels.
- Fun Presentation: Create adorable monster faces that are sure to impress kids and adults alike.
- Versatile Ingredients: Use a variety of candy melts and sprinkles to customize your Monster Oreo Balls for any occasion.
- Perfect for Sharing: With 15 servings, these treats are ideal for gatherings or as party favors.
Tools and Preparation
Before getting started, ensure you have the right tools on hand. Having the necessary equipment will make the preparation process smooth and enjoyable.
Essential Kitchen Tools
- Food processor
- Large mixing bowl
- Electric hand mixer or stand mixer
- Cookie scoop (2 tablespoon size)
- Cookie sheet
- Parchment paper
- Microwave-safe bowl
- Forks or dipping tools
Why These Tools Matter
- Food processor: Quickly crushes Oreos into fine crumbs, saving you time and effort.
- Electric mixer: Ensures thorough mixing of ingredients for a smooth dough-like consistency.
- Cookie scoop: Helps create uniform balls for even coating and presentation.
- Microwave-safe bowl: Ideal for melting candy wafers without risking damage.
Ingredients
Monster Oreo Balls are so easy to make and create the cutest Halloween critters with cookies, cream cheese, and candy melts.
- 36 Oreos
- 8 ounces cream cheese (softened at room temperature)
- 1 teaspoon vanilla extract
- 2 cups white, light green, and purple melting wafers (each)
- 3 tablespoons crisco shortening
- Green, purple, and black jimmy sprinkles (long not round)
- Candy eyes (multiple sizes)

How to Make Monster Oreo Balls
Step 1: Crush the Oreos
- In a food processor, add Oreos (break them apart slightly while adding) and crush until they are fine crumbs.
Step 2: Combine Ingredients
- In a large mixing bowl, combine crushed Oreos, cream cheese, and vanilla extract.
- Mix with an electric hand mixer or stand mixer for 1-2 minutes until fully combined into one dough-like mixture.
Step 3: Form the Balls
- Using a 2 tablespoon cookie scoop, scoop dough from the bowl.
- Form it into an even, smooth round ball using the palms of your hands.
- Place each ball on a large cookie sheet prepared with parchment paper.
Step 4: Chill the Balls
- Place the cookie sheet inside the refrigerator to chill for 2 hours.
Step 5: Prepare Melting Wafers
- Near the end of the chill time, begin preparing the melting wafers.
- Working one color at a time, place wafers in a microwave-safe bowl.
- Heat on 50% power or defrost mode for 1 minute. Stir with a fork and add 1 tablespoon of crisco.
- Return to the microwave in additional 30-second bursts, stirring in between until smooth.
Step 6: Dip the Oreo Balls
- Dip 6-7 Oreo balls inside the melted chocolate using two forks or dipping tools.
- Coat completely before placing back on the cookie sheet. Scrape off excess chocolate if needed.
Step 7: Add Eyes and Sprinkles
- Immediately add candy eyes and sprinkles on top of each ball.
- Feel free to get creative with where you place the eyes!
Step 8: Repeat Melting Process
- Repeat steps 5–7 for each color of melting wafers until all balls are coated.
Step 9: Chill Again Before Serving
- Allow all monsters to chill for another 30 minutes before serving.
Now you’re ready to enjoy your festive Monster Oreo Balls!
How to Serve Monster Oreo Balls
Monster Oreo Balls are a delightful treat perfect for Halloween parties or gatherings. These cute little creatures can be served in various fun and creative ways to make your celebration even more festive.
Creative Platter Ideas
- Monster-Themed Tray: Arrange the Oreo balls on a spooky-themed tray with decorative spiders and cobwebs for an eye-catching display.
- Cupcake Liners: Place each ball in colorful cupcake liners for easy serving and a pop of color.
Fun Pairings
- Milk: Serve alongside a glass of cold milk, which complements the rich flavors of the Oreos.
- Hot Chocolate: Pair with hot chocolate for a cozy treat during chilly Halloween nights.
Garnishing Suggestions
- Whipped Cream: Add dollops of whipped cream on the side for an extra creamy treat.
- Chocolate Sauce Drizzle: Drizzle melted chocolate over the Monster Oreo Balls for added sweetness and visual appeal.
How to Perfect Monster Oreo Balls
To ensure your Monster Oreo Balls turn out perfectly every time, follow these helpful tips.
- Boldly Chill Your Mixture: Chilling the dough ensures that it holds its shape better when forming balls.
- Boldly Use Quality Ingredients: Opt for high-quality Oreos and cream cheese to enhance flavor and texture.
- Boldly Experiment with Colors: Feel free to mix different colors of melting wafers for a unique look that stands out.
- Boldly Control Melting Temperatures: Heat melting wafers slowly to avoid burning; this prevents clumps and ensures a smooth coating.
- Boldly Store Properly: Keep leftover Monster Oreo Balls in an airtight container in the refrigerator to maintain freshness.
Best Side Dishes for Monster Oreo Balls
To complement your Monster Oreo Balls, consider these delightful side dishes that add variety to your dessert spread.
- Bold Fruit Skewers: Fresh fruit on skewers adds a healthy touch alongside the sweet treats.
- Bold Cheese Platter: A selection of cheeses can balance the sweetness with savory flavors.
- Bold Veggie Cups: Offer fresh vegetables with ranch dip for a crunchy contrast against the creamy balls.
- Bold Mini Cupcakes: Bite-sized cupcakes can pair well, allowing guests to sample more than one dessert.
- Bold Pretzel Bites: Salty pretzel bites provide a great snack option that contrasts nicely with the sweets.
- Bold Popcorn Bar: Set up a popcorn bar with various toppings for guests to customize their own popcorn creations.
Common Mistakes to Avoid
Making Monster Oreo Balls is fun, but a few common mistakes can hinder your success. Here are some to watch out for:
- Using cold cream cheese: Cold cream cheese can make it hard to combine ingredients smoothly. Always ensure it’s softened at room temperature for the best texture.
- Not chilling the dough: Skipping the chilling step can lead to messy coating. Chilling helps firm up the dough, making it easier to shape and dip.
- Overheating melting wafers: Heating melting wafers too quickly can cause them to seize or burn. Use low power in the microwave and stir frequently for a smooth consistency.
- Neglecting decorations: Forgetting to add sprinkles or candy eyes right after dipping can result in a less appealing look. Decorate immediately while the coating is still wet for better adhesion.
- Using non-airtight containers: Storing your Monster Oreo Balls in loose containers can lead to them drying out. Always use airtight containers for optimal freshness.
Refrigerator Storage
- Store Monster Oreo Balls in an airtight container.
- They will last up to 5 days in the refrigerator.
Freezing Monster Oreo Balls
- Freeze them in a single layer on a cookie sheet until solid.
- Transfer to an airtight container or freezer bag, and they will last up to 3 months.
Reheating Monster Oreo Balls
- Oven: Preheat at 300°F (150°C) and warm for about 5-10 minutes.
- Microwave: Heat on low power for short bursts of 10-15 seconds until slightly warm.
- Stovetop: Not recommended as it may alter texture; best enjoyed cold or at room temperature.
Frequently Asked Questions
How many servings does this Monster Oreo Balls recipe yield?
This recipe yields approximately 15 delicious Monster Oreo Balls, perfect for sharing at gatherings!
Can I customize my Monster Oreo Balls?
Absolutely! Feel free to experiment with different colors of melting wafers and various decorative sprinkles or toppings.
How should I store leftover Monster Oreo Balls?
Store any leftovers in an airtight container in the refrigerator. They stay fresh for up to 5 days.
Are Monster Oreo Balls suitable for kids?
Yes! These treats are fun and easy to make with kids, allowing them to get creative with decorations.
Can I use other types of cookies instead of Oreos?
Certainly! Any chocolate wafer cookies can work as an alternative base for this recipe, providing a delightful twist.
Conclusion
Monster Oreo Balls are not only easy to prepare but also incredibly versatile. With their fun designs and delicious flavors, they are perfect for Halloween parties or any festive occasion. Feel free to customize your monster creations with different colors and toppings, making each batch uniquely yours!

Monster Oreo Balls
- Total Time: 20 minutes
- Yield: Approximately 15 servings 1x
Description
Monster Oreo Balls are the ultimate festive treat for Halloween gatherings, combining fun with flavor for everyone to enjoy. These charming bite-sized delights are crafted from crushed cookies blended with cream cheese and coated in vibrant melting wafers. They’re not just a visual feast but also offer an irresistible creamy texture that will delight both kids and adults alike. Perfect for parties, school events, or as a spooky snack at home, these Monster Oreo Balls are sure to be a standout hit. The ease of preparation makes them accessible for bakers of all skill levels, allowing you to get creative with colors and decorations. Serve them on a themed platter or in colorful cupcake liners to elevate your Halloween festivities!
Ingredients
- 36 Oreos
- 8 ounces cream cheese (softened)
- 1 teaspoon vanilla extract
- 2 cups melting wafers (white, light green, purple)
- 3 tablespoons shortening
- Green, purple, and black sprinkles
- Candy eyes
Instructions
- Crush the Oreos in a food processor until fine crumbs form.
- In a mixing bowl, combine crushed Oreos, cream cheese, and vanilla; mix until smooth.
- Scoop the mixture into uniform balls using a cookie scoop and place on a parchment-lined cookie sheet.
- Chill the balls in the refrigerator for 2 hours.
- Melt the wafers one color at a time in a microwave-safe bowl; add shortening for smoothness.
- Dip each ball into the melted coating and place back on the sheet; immediately add candy eyes and sprinkles.
- Repeat with remaining colors and chill again for 30 minutes before serving.
- Prep Time: 20 minutes
- Cook Time: 0 minutes
- Category: Dessert
- Method: No-bake
- Cuisine: American
Nutrition
- Serving Size: 1 serving
- Calories: 150
- Sugar: 10g
- Sodium: 65mg
- Fat: 7g
- Saturated Fat: 4g
- Unsaturated Fat: 2g
- Trans Fat: 0g
- Carbohydrates: 19g
- Fiber: <1g
- Protein: 1g
- Cholesterol: 10mg