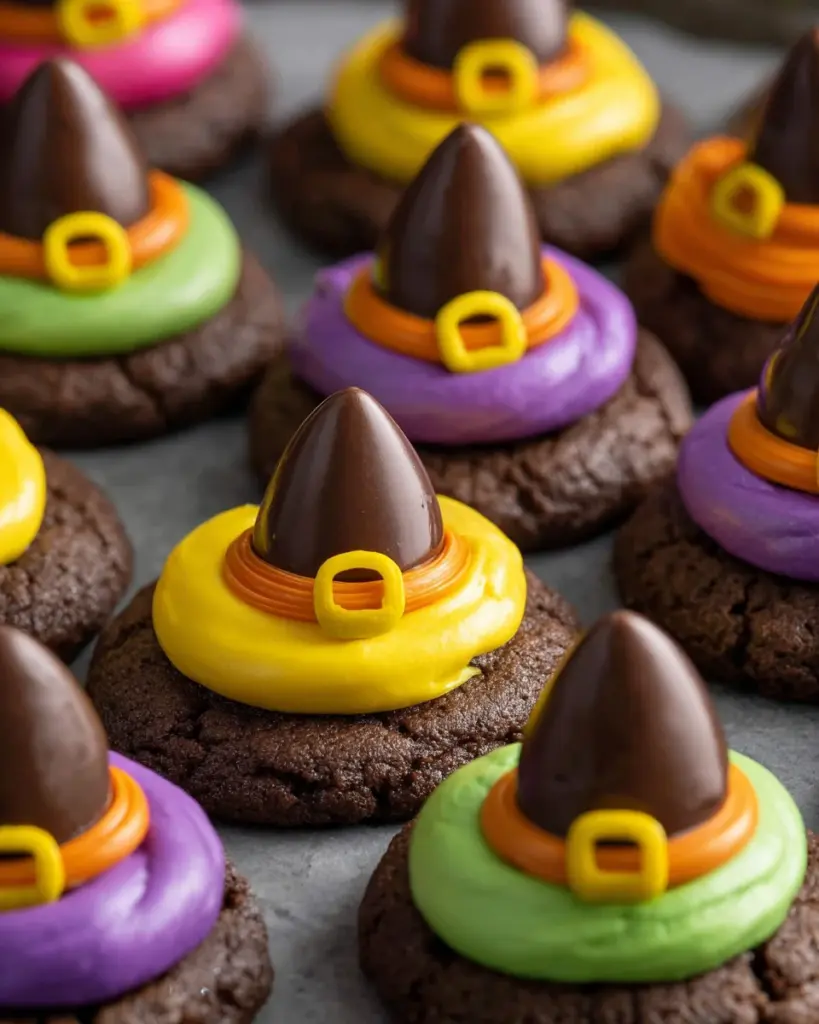
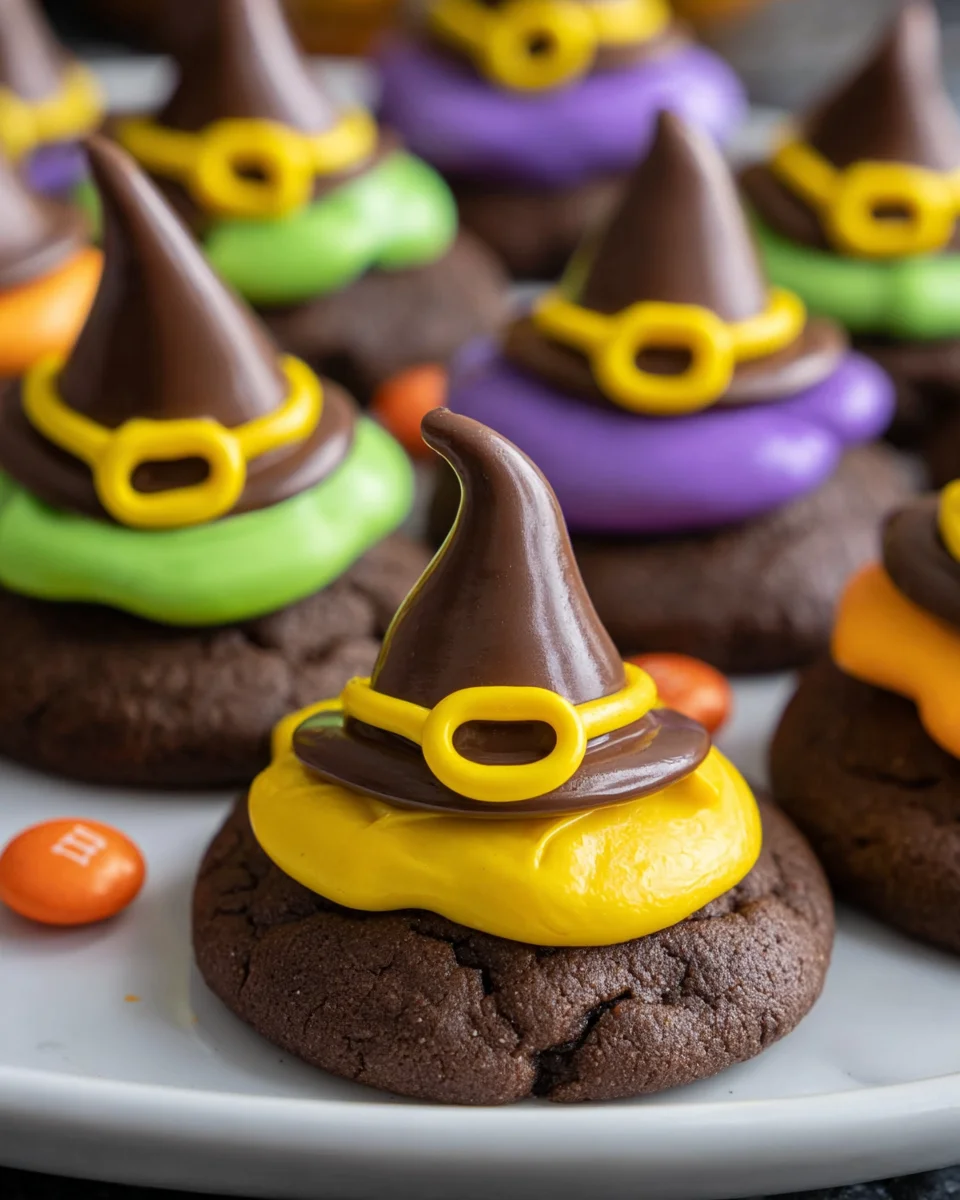
Witch Hat Cookies are a delightful and fun treat perfect for Halloween celebrations. These no-bake cookies not only look adorable but also provide a fantastic opportunity to craft with kids. With their charming design and easy preparation, they’re ideal for parties, classroom events, or just a cozy night in. The combination of fudge-covered cookies and colorful frosting makes them stand out on any dessert table!
Why You’ll Love This Recipe
- Easy to Make: With just a few simple steps, kids can join in on the fun of creating these spooky treats.
- Customizable Colors: Use various food coloring to match your Halloween theme or personal preferences.
- No Baking Required: Perfect for those who want quick and easy treats without heating up the kitchen.
- Fun for All Ages: Great for kids and adults alike, making it a wonderful family activity.
- Deliciously Sweet: The combination of chocolate kisses and colorful frosting will delight every sweet tooth.
Tools and Preparation
To make Witch Hat Cookies, you’ll need some essential tools to ensure a smooth process.
Essential Kitchen Tools
- Baking tray
- Small bowls
- Piping or sandwich bags
Why These Tools Matter
- Baking tray: Provides a stable surface for assembling your cookies without mess.
- Small bowls: Ideal for dividing frosting and mixing colors efficiently.
- Piping or sandwich bags: Perfect for applying frosting neatly and accurately onto the cookies.
Ingredients
No bake Witch Hat Cookies are a cute, edible Halloween craft to make with kids.
Ingredients:
– 1 packet fudge-covered cookies
– 16 ounce tub of white frosting
– Food coloring
– 18 Chocolate kisses (unwrapped) (1 for each cookie)
– 18 Mini yellow M&Ms (1 for each cookie)
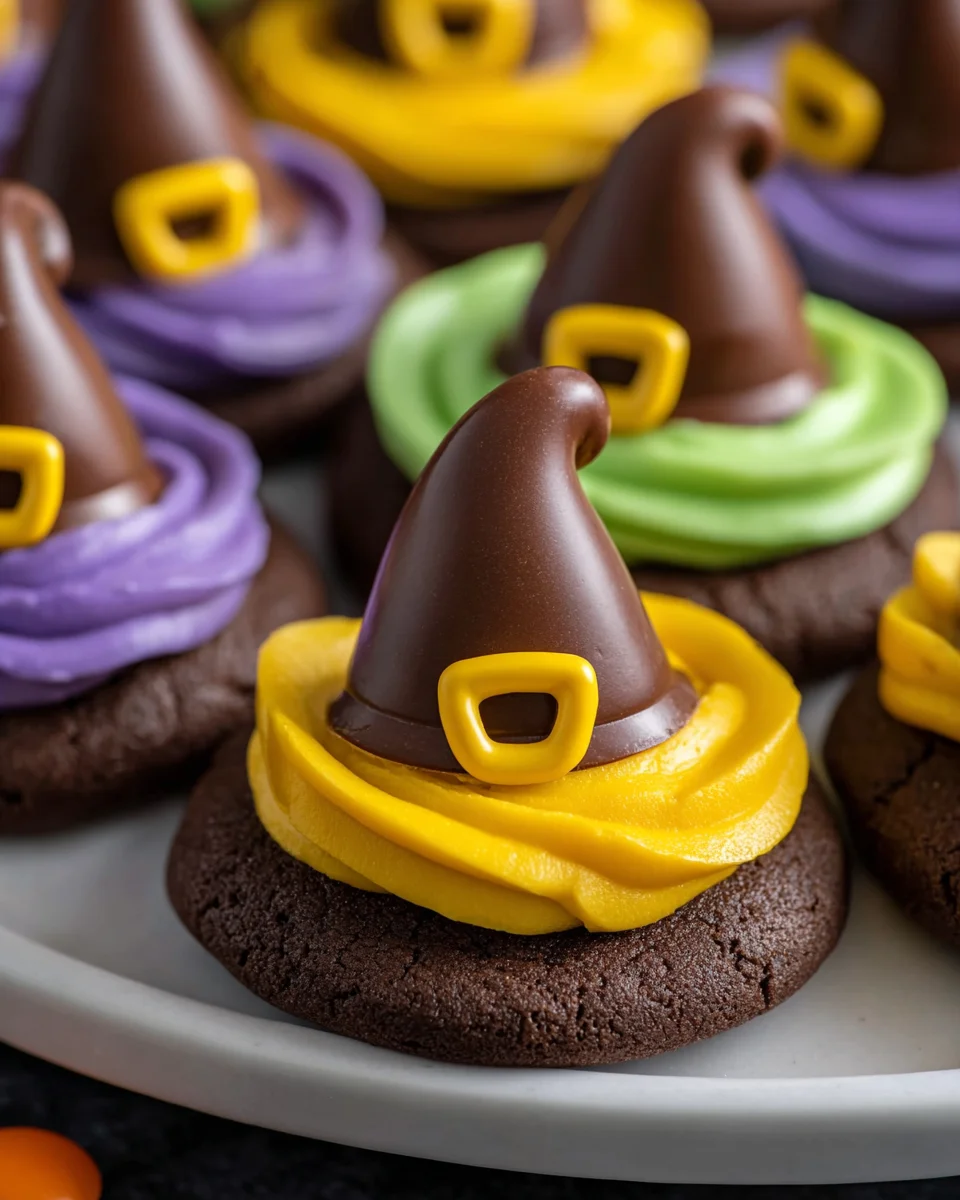
How to Make Witch Hat Cookies
Step 1: Arrange the Cookies
Begin by arranging the fudge-covered cookies in a single layer on a baking tray. This will be the base of your witch hats.
Step 2: Prepare the Frosting
Divide the white frosting into small bowls based on how many different colors you wish to create. Add food coloring to each bowl until you achieve your desired shades.
Step 3: Pipe the Frosting
Transfer each colored frosting into piping or sandwich bags. Cut off a small corner of each bag. Squeeze out a dollop of frosting about the size of a chocolate kiss in the center of each cookie.
Step 4: Create the Witch Hats
Press one chocolate kiss down into the center of the frosting on each cookie. As you press down, the frosting will spread out slightly creating an attractive ring around the kiss.
Step 5: Add Buckles
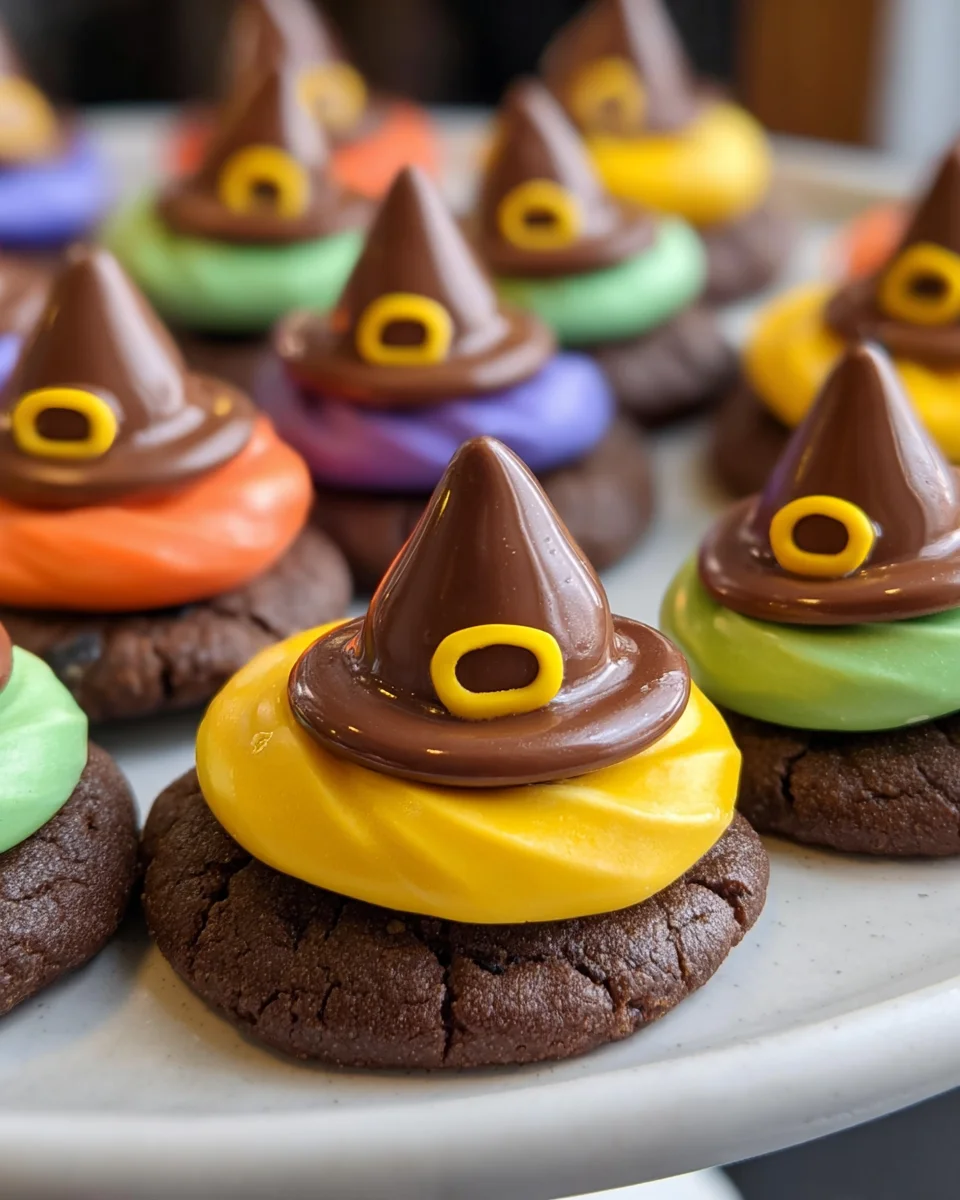
Place one mini yellow M&M onto the band of frosting around each cookie to resemble a buckle. This adds an extra touch of cuteness!
Step 6: Let Them Set
Allow the frosting to set for about 15-20 minutes before enjoying your delicious witch hats. They’re ready to be served at your next Halloween gathering!
How to Serve Witch Hat Cookies
Witch Hat Cookies are not only delicious but also fun to make and serve. These cute treats add a festive touch to any Halloween gathering or kids’ party. Here are some creative serving suggestions to enhance your experience.
Fun Presentation Ideas
- On a Spooky Platter: Arrange the cookies on a black or orange platter for a Halloween-themed display.
- With Halloween Treat Bags: Place cookies in small treat bags for guests to take home as party favors.
- Decorated Dessert Table: Incorporate the cookies into a larger dessert table filled with other spooky treats for an eye-catching setup.
Pairing with Drinks
- Hot Chocolate: Serve with warm hot chocolate topped with whipped cream for a cozy treat.
- Apple Cider: Complement the cookies with chilled apple cider for a refreshing fall drink option.
- Milk: Classic milk pairs perfectly with these cookies, balancing their sweetness.
How to Perfect Witch Hat Cookies
Perfecting your Witch Hat Cookies is easy with a few helpful tips. Here’s how you can make them even more delightful.
- Bold Colors: Use vibrant food coloring for your frosting to make the witch hats stand out and look more festive.
- Even Frosting Dabs: Ensure each cookie has an even dollop of frosting so that the chocolate kiss sits snugly on top without tipping over.
- Fresh Ingredients: Use fresh ingredients, especially when it comes to the cookies and frosting, for the best flavor and texture.
- Personalize Decorations: Get creative by adding edible glitter or sprinkles on top of the frosting for extra flair.
Best Side Dishes for Witch Hat Cookies
Serving your Witch Hat Cookies alongside delightful side dishes can elevate your Halloween celebration. Here are some great options to consider:
- Pumpkin Soup: A warm, creamy pumpkin soup is perfect for fall and complements sweet treats nicely.
- Cheese Platter: Include assorted cheeses with crackers and fruits for a savory balance to the sweetness of the cookies.
- Veggie Sticks with Dip: Fresh vegetables like carrots and celery served with ranch dip offer a healthy contrast.
- Fruit Salad: A colorful fruit salad brings freshness and cuts through the richness of the cookies.
- Popcorn Mix: Create a spooky popcorn mix with candy corn, pretzels, and nuts for a fun snack option.
- Mini Sandwiches: Small sandwiches filled with turkey or chicken provide a satisfying bite that pairs well with sweets.
Common Mistakes to Avoid
When making Witch Hat Cookies, it’s easy to overlook some important steps. Here are common mistakes to avoid:
- Skipping the Frosting Color Test: Not testing your food coloring can lead to unexpected shades. Always mix a small amount first to ensure it matches your vision.
- Overloading the Frosting: Adding too much frosting can cause it to overflow when you press in the chocolate kiss. Use just enough to create a neat dollop.
- Not Allowing Time to Set: Rushing the setting time may result in messy cookies. Be patient and let them sit for at least 15-20 minutes after assembly.
- Ignoring Storage Tips: Storing cookies improperly can affect their freshness. Use airtight containers for best results.
- Using Warm Ingredients: If your frosting is warm, it may not hold its shape. Ensure all ingredients are at room temperature before starting.
Refrigerator Storage
- Store Witch Hat Cookies in an airtight container.
- They can last up to 5 days in the refrigerator.
- Keep them separated with parchment paper to prevent sticking.
Freezing Witch Hat Cookies
- Freeze cookies for up to 2 months.
- Place them in a single layer in a freezer-safe container.
- Wrap each cookie individually for better protection against freezer burn.
Reheating Witch Hat Cookies
- Oven: Preheat to 300°F (150°C) and heat for 5-7 minutes until slightly warmed.
- Microwave: Heat one cookie at a time for about 10-15 seconds on low power.
- Stovetop: Place a cookie on a non-stick skillet over low heat for about 1 minute, checking frequently.
Frequently Asked Questions
What are Witch Hat Cookies?
Witch Hat Cookies are fun, no-bake treats made from fudge-covered cookies topped with chocolate kisses and colorful frosting, perfect for Halloween celebrations.
How long does it take to make Witch Hat Cookies?
The preparation time is about 15 minutes, and with setting time, the total time comes to approximately 30 minutes.
Can I customize my Witch Hat Cookies?
Absolutely! You can use different colors of frosting or candy toppings like sprinkles or mini chocolate chips for unique designs.
How should I store leftover cookies?
Store leftover Witch Hat Cookies in an airtight container in the refrigerator for up to five days.
Conclusion
Witch Hat Cookies are a delightful treat that combines creativity and flavor, making them perfect for Halloween festivities. Their customizable nature allows you to add personal touches, whether through colors or additional toppings. Give this fun recipe a try, and enjoy crafting these spooky delights!

Witch Hat Cookies
- Total Time: 15 minutes
- Yield: Makes approximately 18 cookies 1x
Description
Witch Hat Cookies are a whimsical and delightful treat that adds a festive touch to any Halloween celebration. These no-bake cookies are easy to make, making them perfect for kids and adults alike. With just a few simple ingredients, you can create these charming chocolate hats topped with colorful frosting and candy accents. Ideal for parties, classroom events, or cozy family nights, Witch Hat Cookies not only taste delicious but also provide an excellent opportunity for creative crafting with loved ones. Gather your ingredients and get ready to whip up these enchanting treats that are sure to impress your guests!
Ingredients
- 1 packet fudge-covered cookies
- 16-ounce tub of white frosting
- Food coloring
- 18 chocolate kisses (unwrapped)
- 18 mini yellow M&Ms
Instructions
- Arrange the fudge-covered cookies in a single layer on a baking tray.
- Divide the white frosting into small bowls and mix in food coloring to achieve desired shades.
- Transfer colored frosting into piping bags and squeeze out a dollop onto each cookie.
- Press one chocolate kiss into the center of the frosting on each cookie.
- Top each hat with a mini yellow M&M to create a buckle effect.
- Allow the cookies to set for about 15-20 minutes before serving.
- Prep Time: 15 minutes
- Cook Time: 0 minutes
- Category: Dessert
- Method: No bake
- Cuisine: American
Nutrition
- Serving Size: 1 cookie
- Calories: 140
- Sugar: 12g
- Sodium: 70mg
- Fat: 6g
- Saturated Fat: 3g
- Unsaturated Fat: 2g
- Trans Fat: 0g
- Carbohydrates: 21g
- Fiber: 0g
- Protein: 1g
- Cholesterol: 0mg
